
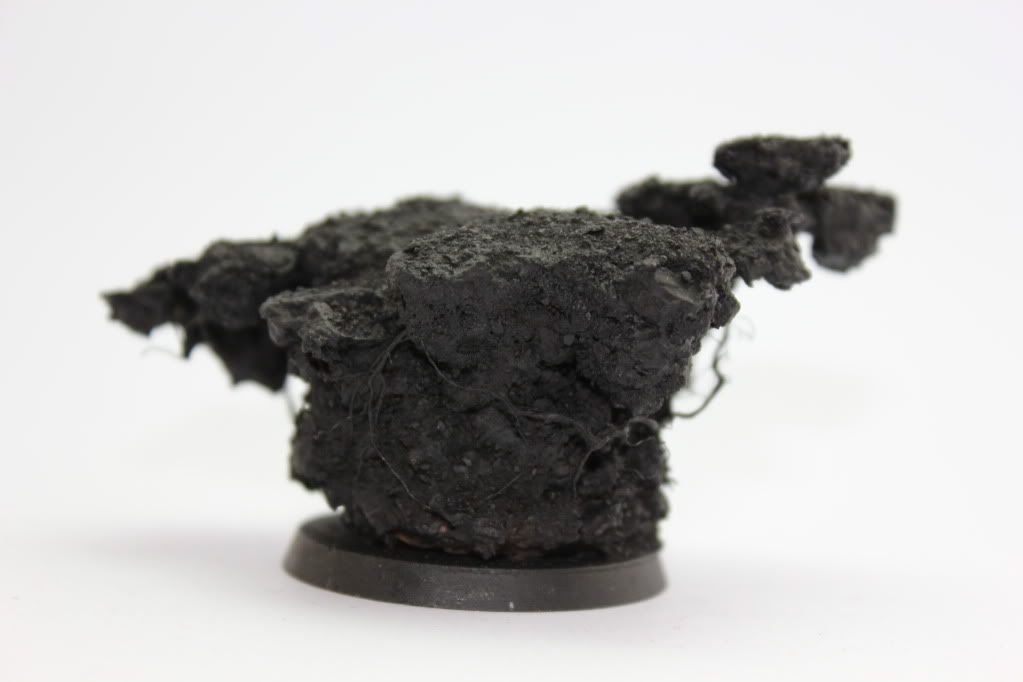
now i'm going to show you how to transform it into this:

pretty neat huh? anyway let's get to it.
THE SHOPPING LIST
-black AND white undercoat spray. this will save you a lot of difficult work so just do it ok?
-a range of brown paints. this will vary depending on what type of soil you want the base to have. don't limit your options.a bigger range is better, even if you don't use some of the paints.
-brown, red and violet shades/washes/inks (if you are using non shiny of these, mix a tiny bit of gloss varnish/water effects into one of the washes (i do it to the first brown one i use), but be careful, you don't want to put in too much)
-water effects or gloss varnish (i'd dilute it a little first)
- a variety of base decorating materials
-a good sharp hobby knife
-some tweezers (i use two psirs but if you only want to get one go for the fine eyebrow needlenose ones. ask the missus, she'll know what you're talking about)
-and the roots, superglue, and activator from part 1 of this tutorial
for the base decorating materials, you will need quite a few different items to make a truly realistic looking base. if you want to get the products i use, check out the range HERE. i'd personally suggest you go for one of the grasses basing kits (you need the long grass in them) leaf litter, and the tufts of your choice. if you are choosing tufts however, think carefully about what colours you will paint your base, and even to an extent, the miniature you will put on the base. the wrong colour choices could mean the miniature itself looks terrible, but i'll post more about that at a later date.
enough of this, let's get down to buisness
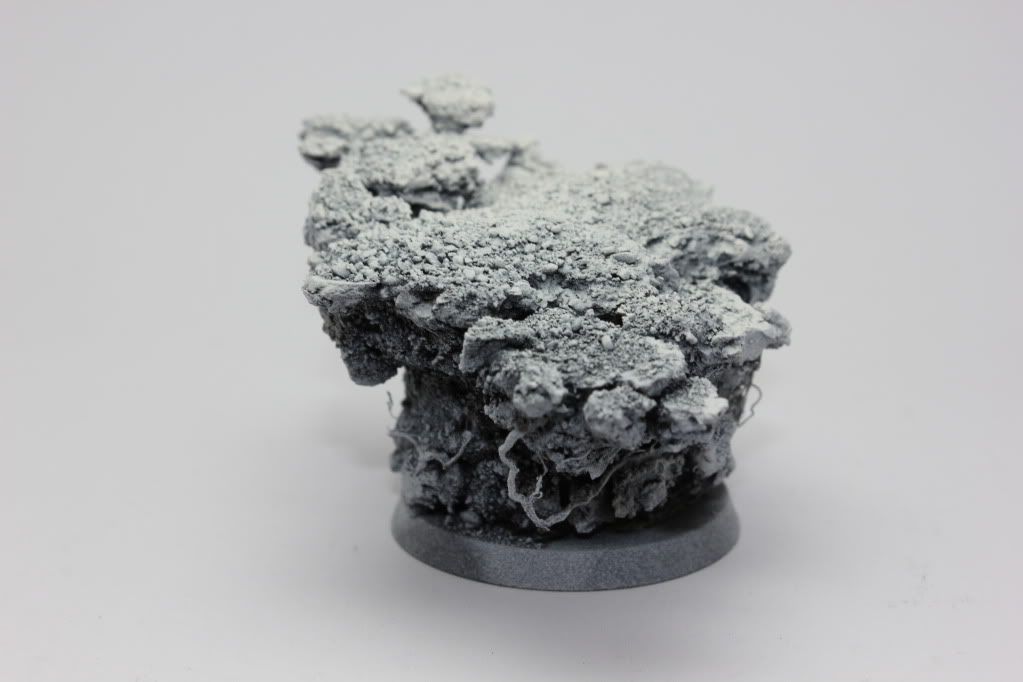
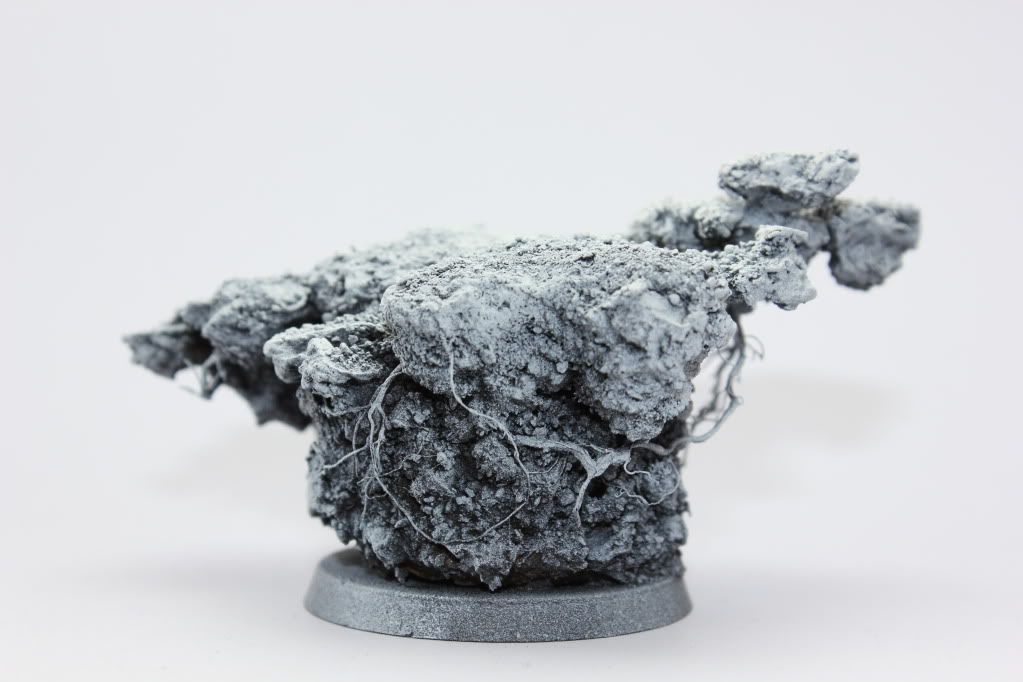
first we're going to undercoat the base with black spray. this is just a standard undercoat, just like you would undercoat your minis. get a nice even coat with short bursts from the can and get most of it covered, rotating and tilting the base in your hands as you go. however, you will get a few areas that cannot be reached by the spray no matter how much you try. leave these. the base is going to be brown (unless you are painting it lime green or something) so it's not a very big deal if there are a few SMALL patches missing a n undercoat. note that this is not an excuse to do a half arsed job on undercoating your base!!!
your undercoated base should look something like the picture above. you can start to see the base coming together now right? all those strange and weird looking parts of the base are covered up, and it looks like somebody's set fire to a strange piece of earth. if you want that: great! give a light drybrush with grey and you're done, however i want it to look unburnt so i'm going to keep going.
the next step is to re-spray the base with white primer. yes, i know that sounds stupid, but take my word for it. this saves you a LOT of time in the next few steps. the trick is with this coat, to not try and get that smooth even finish that we did with the black coat, as you still want that to show through.
 |
| le spraying the white on the base |

the trick to not stuffing this kind of spraying up is to spray in "taps". you only spray in 3 second max bursts(i usually do about a second), and keep rotating the base around as you work. remember to spray a tiny bit on the sides as well, but not much, as you want the sides of the base to be darker than the top. this coat will take very little time to be applied, so don't freak out if it only takes you about 30 seconds or so.
after the two undercoats, you should have something like this:
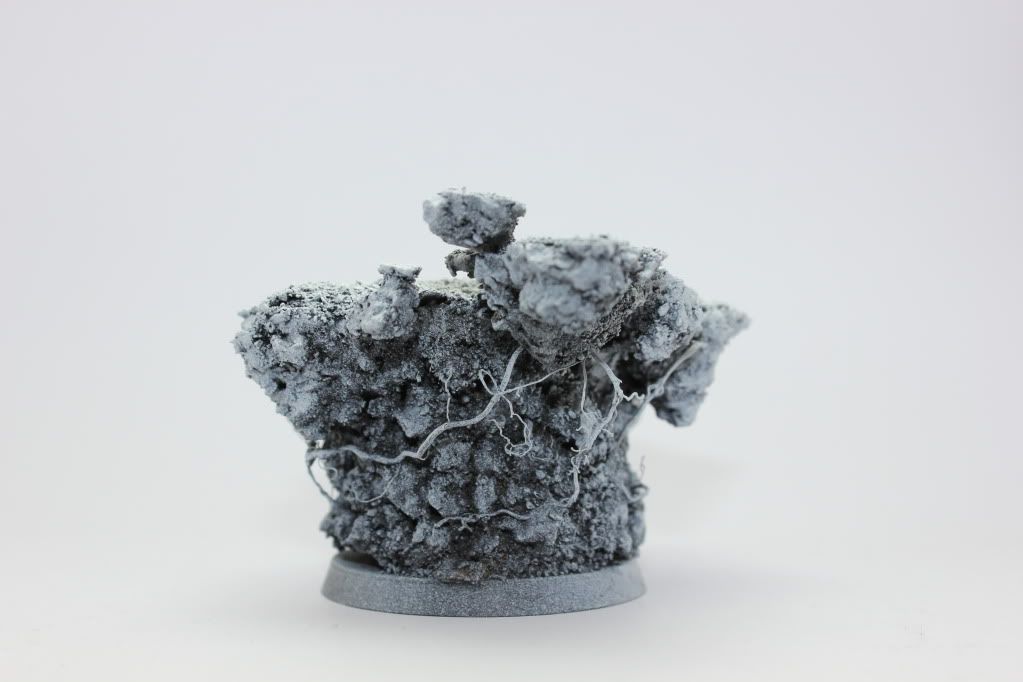
you can see i've sprayed a tiny bit too much white around the sides, but that's ok. it just means i'll have to apply a bit more shading than normal on the sides of the base.
now it's time to make this kinda bland base come alive with colour. however there is a very important step that we need to do before putting colour onto the base, and that is choosing our basing materials and colours. this might be a step you would like to do before you undercoat or even before you assemble your base, but i like to do it here, because you can really see what kind of texture the sand has brought out in your base. seeing this texture helps me decide what kind of earth this is, and then, what colours and basing materials i'll need to paint and decorate it with.
when i looked at this base, i saw the the way it was made has made it look quite rocky. the soil is clumped together, so the base itself would b good for a very dry rocky soil, like highlands or snowy plains in summer. this is a liitle off of what i wanted the base to look like in part 1, but that's alright. they don't always turn out the way you'd expect. my suggestion is to keep going with the base, as you will probably surprise yourself with the result.
after you've looked at what kind of soil you wish to paint, it's time to choose out some colours. this is not just the paints either, you need to choose out the tufts and other basing materials that you want to make both the base and the mini look good. my suggestion is to also get out your mini (if it's painted) and look at the colours. these will help you decide what colours your base will be. for this (as currently there is no mini to go on this base) i pulled out my basing draw and got all the stuff that would be relevant for putting on a finished base
 |
| sorry for bad lighting |
as you can see, i have a lot of material, and this is only a fraction of what is actually in my basing draw. to help you out i'll split this up into a few groups.
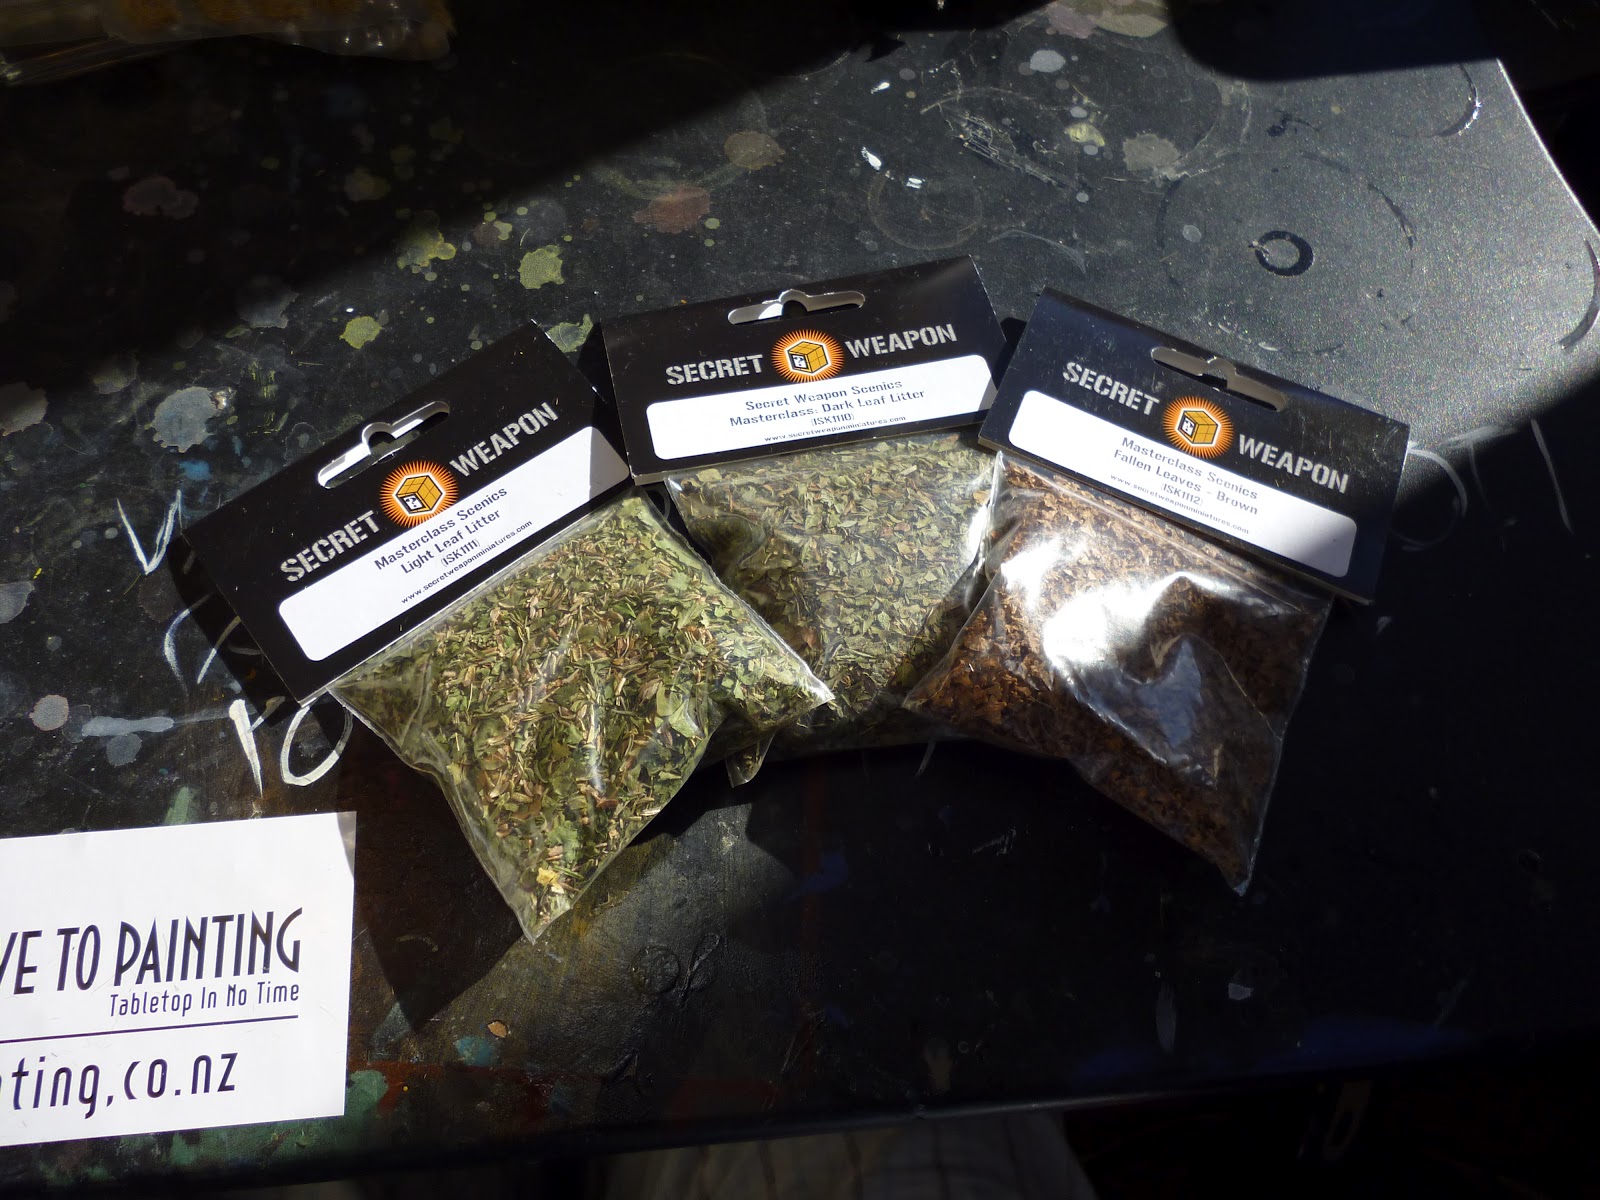
the first is the secret weapon leaves. this material is really good for making leaf litter and forest type bases. i doubt i'll be using this, but i might use the fallen leaves if i make a dead bush on the base.

the second group is the army painter masterclass series tufts. these tufts are made by another company called miniNatur, which makes natural looking grass and tree products for model train sets (as you can see on the back of the packet), and are known for the incredibly high quality and realism of their products. they look incredibly life-like when put onto a base. these are my prefered brand of tufts to use when making scenic bases.

the third group are random things i've picked up which might be helpful to the base. here you can see long hair done by the company nosch, another model train company, and tufts by Games Workshop. the gw tufts are lower in quality than the army painter ones, but are useful for basing the troops of large armies, as there are quite a few of them as you can see here.
after some decision making, i decided to use the highlands tufts by army painter and the long hair. i would personally have used a lighter colour for the hair if i had one, but i wanted to show you a few different techniques for adding extra details to your base, and the finished result turned out to be very nice anyway.
the next thing is to choose the paints. i had a look at the brown section in my paint draw, and chose a range of colours that would suit the colours of the decoration materials i was going to put on the base.

i didn't use all of these colours, only about 4 or 5, but it's good to have a nice range to pick from. this colour choice is really up to your taste, but if you want to know the colours i chose, they are: Agrax Earthshade, Scorched Brown, Khemri Brown, Vermin Brown, Dheneb Stone, Screaming Skull, and Druchii Violet from games workshop, and Burnt Umber and Choclat Brown from Vallejo model colour.
things are starting to drag on a bit now, so i'll move on to the next step
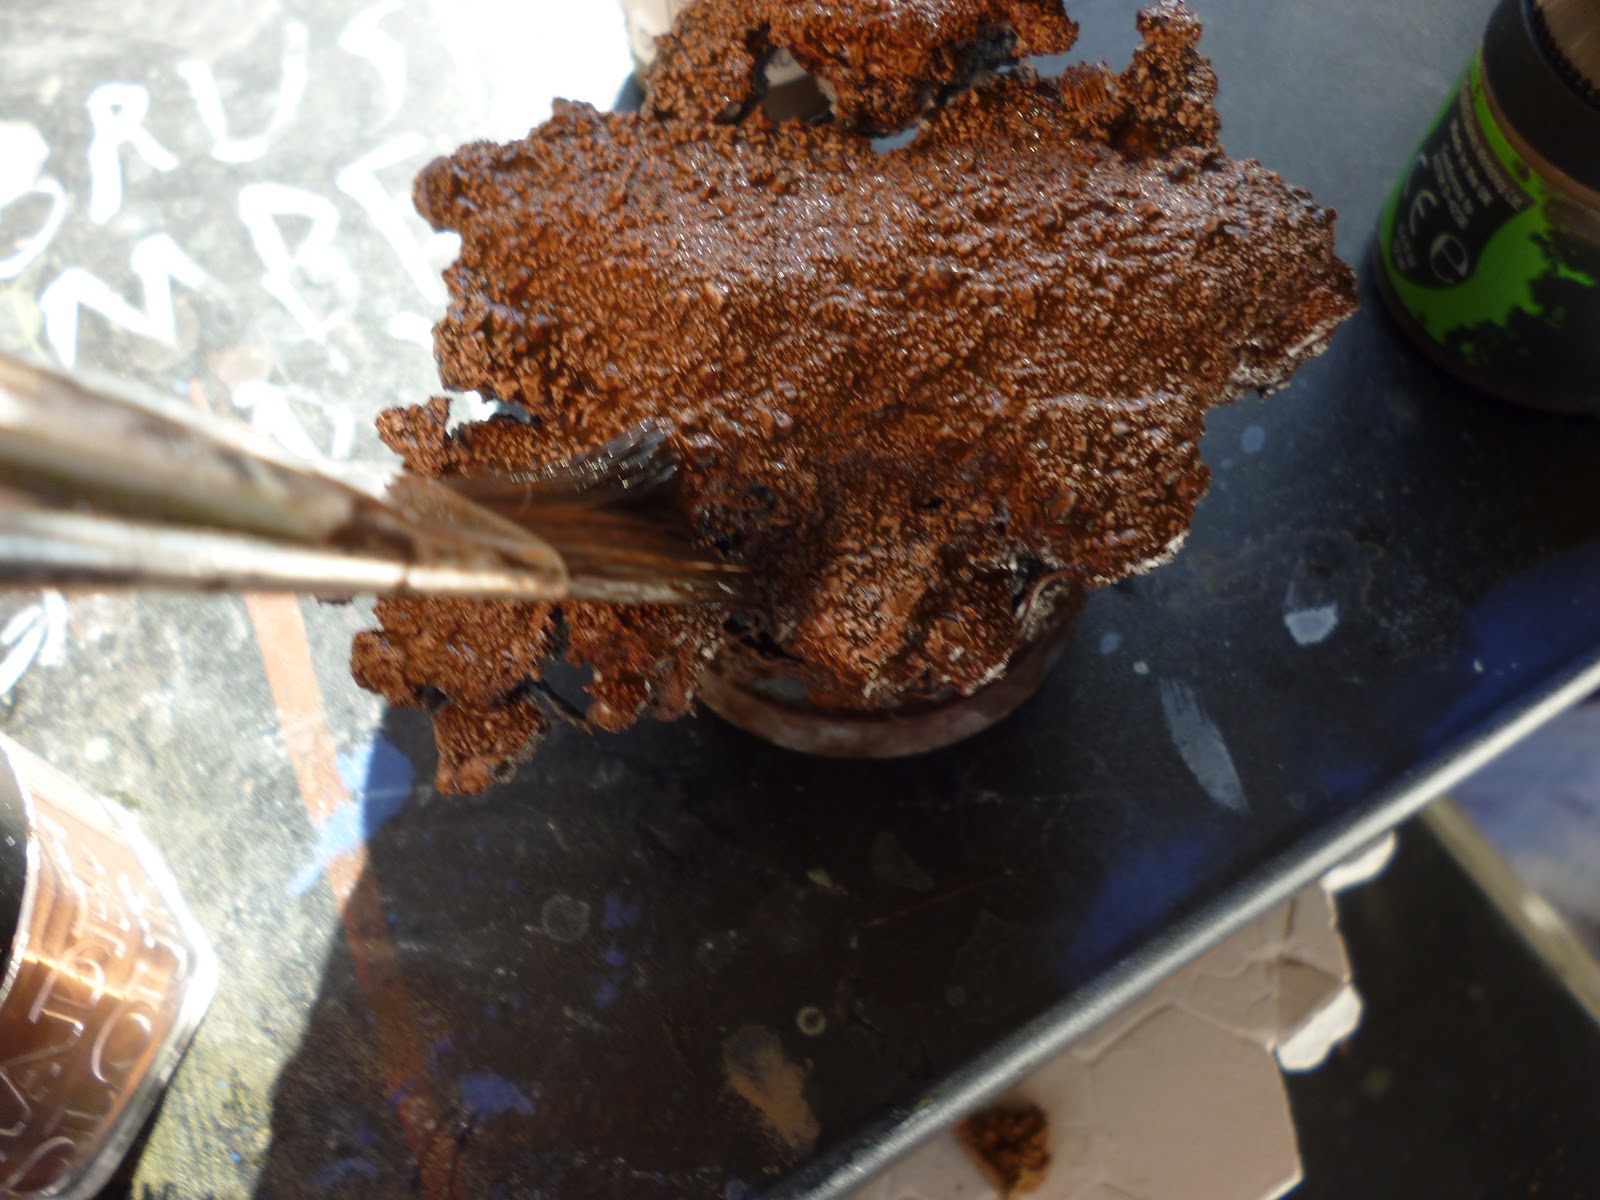
thin down a darker brown (in this case i used a mix of Scorched and Choclat brown) until it's at least 1:1 parts paint and water(i usually do a bit more water than that). then apply to the base. this doesn't have to be neat, and it only needs one coat(apply paint like a thick wash). here you will start to see why we did the two undercoats. the paint will be very runny and run into the recesses. this leaves a little on the white areas of the base, and creates natural shading.

you can see i use a large brush, and am not very careful with the base. there's no need to be. this is just getting colour onto the mini, and if the roots snap, it just helps make the mini look a bit better (the big ones shouldn't, they are quite strong).
i also don't apply the first mix to all the areas. instead i apply Agrax Earthshade to some areas of the base as well (with a drop of gloss varnish in it). this is done to mostly the recess of the base, and done while the other paint is still wet. this is kind of like wet blending, so be cautious of turning your base into a single colour. if you really feel insecure about doing it this way. wait for the first coat (scorched and Chocolat brown mix) to dray and then apply the shade, only tease out the edges with a wet brush to get an even transition. don't worry if it's rough, the amount of texture on the base is highly forgiving of mistakes. another note to make here is that there are some areas you can't reach with the brush. try to get some paint into them, but ton't worry too much. these areas will probably only have black undercoat in them, so it helps with the shading of the base. don't leave too many areas blank though!! (i did, and i need to do some retouches on the base now it's complete >.< )

i also add a little Vermin brown to the first mix and bend the top areas of the base. this will make the top soil look like it's getting more light than the other areas, which is what you really want.
another important thing to do is to put the earthshade wash on to the edges of the top of the base. doing this will create a natural spotlight effect for your mini, and help it stand out more from the base.
now your base should look something along the lines of this

 |
| many of the colour changes are too subtle for the camera to pick up sorry |
the next step is the drybrushing. now let your base dry completely, otherwise you will end up with a mess (i blasted the hair dryer at it for a few minutes). focus on the lightest parts, and don't drybrush the bits that will be in the shadows (between the floaty bits and main base, deep recess etc. for those of you who don't know know how to drybrush, you take a bit of paint on an old or tough paintbrush, wipe off the paint on a paper towel until there's hardly any paint left, and then gently brush if over the area you want drybrushed. the colour i used in this drybrush was a mix of Khemri Brown and Screaming Skull, with a tiny dash of Vermin Brown added too. i wanted the drybrush colour to be particularily light to nicely pick up the edges and give the feeling of dry earth.

then it was time for the shading. i used both pure Agrax Earthshade and a mix of Agrax Earthshade and Druchii Violet to give off a nice earthy feel to the base (no gloss varnish or shine in these shades). you want to use these shades in different areas, and be careful to keep them randomised, otherwise your base will look very fake. i also re applied them in top of the base to accentuate the spotlight effect. a nice trick i commonly use is to apply the mix shade to places where i'll think there will be water patches, as this gives the effect of a richer, darker soil. after i had applied the shade, i drybrushed over the more highlighted areas, mainly on top of the base, with pure Screaming Skull.

now that's all the painting done. yay! you should have something that looks a little like this:


in the top photo, you can really see the effect of the spotlighting. i also concentrate my drybrushing up there. this will really help your mini stand out from the base.
the final step in this tutorial is the decoration. the base itself is nicely painted, but it just looks like a pile of dirt. we want to make it look like a piece of the world the mini's in, and usually that involves some kind of decoration, grass etc. at this point i usually go and have a good look through my basing draw again, and make sure that the colours suit, if not, i'll pull out a new set of decorations and use them instead. in this case, the colours worked well together so i decided to use what i first pulled out. i also decided i'd add a small bush so i pulled out my roots container and the secret weapon fallen leaves from my basing draw.
to start off with, i put the tufts on my base. after removing the sheet from the packet, i carefullly pull out the one want with tweezers. sometimes the tufts also stick together. if i only want a piece i gently pull that piece away from the others and it comes off easily and cleanly. i only do this occasionally though.

now it's time to stick the tuft to the base. you will notice that the army painter tufts have a bit of sticky substance on the back of them. this is good however it is not sticky enough to hold on to a rough texture like our base. so after removing the tuft from the sheet, put a blob of superglue on you palette, and carefully dip the base of the tuft into it.

and then plant it onto your base

a word to the wise. test out your glue on the tuft before attempting to apply it to the base. for the army painters, superglue works fine, but for tufts like Games Workshop. i found out the hard way that superglue causes them to curl up into themselves. test it on a tuft you're not putting on the base first, and if it's fine then use the superglue. if not, use PVA glue instead.
also think about where you are going to put your tufts. it's very rare to see a complete matt of grass close up, as it usually forms in clumps with dirt patches around it. you also want the work that you did on top of the base to sow through, otherwise it would have been a waste. remember the top of your base is nnt flat, and grass usually likes to grow in more sheltered areas. i want to accentuate this because of the harsh climate that i'm trying to reflect in my base, so i plant the grass tufts in the deeper areas. i can usually make a natural grass feel with just sight (as i've been surrounded by it for most of my life) but i'd suggest that you do a little research before applying the grass to your base. remember to use different sized tufts, and don't use several small tufts to cover an area that one bigger one could do easier.
after applying the tufts, your base should look something like this.


 |
| apologies for the dark photos |
this is the extent i went to on the other base that i showed on the city guard website. if you wish to stop here then you can. you will still have a very nice looking base. i am just going to show you a few tricks i picked up after finishing that base. they are not mandatory, but i think they really give the base that little bit more interest.
first off, we're going to get a small bundle of that long hair and carefully place a small droplet of superglue on it. then unscrew the spray nozzle of the activator and use the tube to put a drop of the liquid onto the supergle.

then carefully trim the edges of the hair to the height you want (remember to cut them to slightly different heights). also cut the grass through the superglue, as you only need a little of it to hold the budle together

then carefully glue to the base. it takes a lot of pratcice and patience to get this right, and you may need to cover up some mistakes with small tufts if you make them.
the final trick i'd like to show you is how to make a dead bush. first off, have a look through your spare roots from part 1 and look for one that looks kinda like a tree. if you need to you can cut off sections of roots and also glue sections of roots on to make it look more tree like. then attach to the base.

get some fallen leaves and glue onto the tree thing. i drop some activator onto the tree and dip the leaves in superglue, then attach to tree. you only need a tiny bit to secure them.. i also put some leaves onto the ground around the tree. remember, don't put too many on. this is a dead tree, not a living one.
finally, brush a little bit of water effects (i put a drop of earthshade in mine too) onto some areas of the base to make it glisten

...and there you have it. that is, in a nut shell, how i make my bases. it's really simple, and easy to make variations of. i'll post some up when i complete them. anyway here are the (rather dark thanks to clouds) final images of the base.


as a final note, here's a mini update on the titan's feet base. this was taken a few days ago. most of the corking is in place now, just some small gaps to fill before applying roots and sand

until next time
-Claire
p.s. if you see some strange white lines in the text. sorry! i'm having uploading problems, and i'm trying to fix it
Need more photos :-p Need more updates :-p
ReplyDeletei'm working on it! how can i take photos when i'm working??
Delete:-) :-) :-)
ReplyDelete